UDN
Search public documentation:
ProceduralBuildingsTutorial
日本語訳
中国翻译
한국어
Interested in the Unreal Engine?
Visit the Unreal Technology site.
Looking for jobs and company info?
Check out the Epic games site.
Questions about support via UDN?
Contact the UDN Staff
中国翻译
한국어
Interested in the Unreal Engine?
Visit the Unreal Technology site.
Looking for jobs and company info?
Check out the Epic games site.
Questions about support via UDN?
Contact the UDN Staff
UE3 Home > Static Meshes > Procedural Buildings Tutorial
Procedural Buildings Tutorial
Overview
Getting Set Up
Gather Meshes
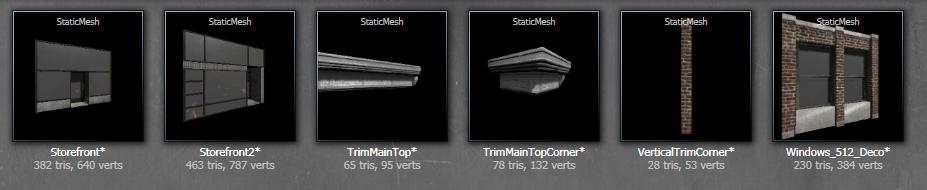
You will need a set of Static Meshes to be used as building blocks for the building. Each mesh should be created so that the pivot point is in the lower left corner of the mesh when facing it. Create a new package and import these meshes into it. You will need:- A window or wall mesh that can be repeated
- A corner mesh that matches the height of the window or wall mesh
- A few storefront meshes
- A top trim mesh that can be repeated
- A corner mesh that matches the height of the trim mesh
Create A New Ruleset
Create a new ProcBuilding Ruleset in your package by right-clicking and selecting it from the list.
Create A ProcBuilding Volume
Edit the Brush Builder - Cube by right-clicking on the cube in the toolbar. Change the values so that x=1024, y=2048, and z=512. Right-click on the volume icon and select ProcBuilding.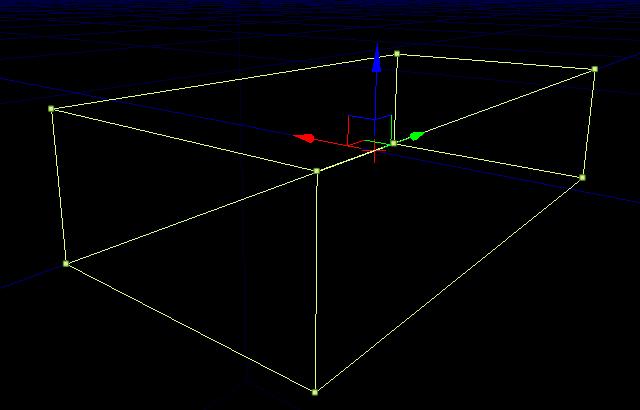 Apply your new ProcBuilding Ruleset by dragging it from the Content Browser and onto the ProcBuilding Volume.
Setting Up The Floors Of The Building
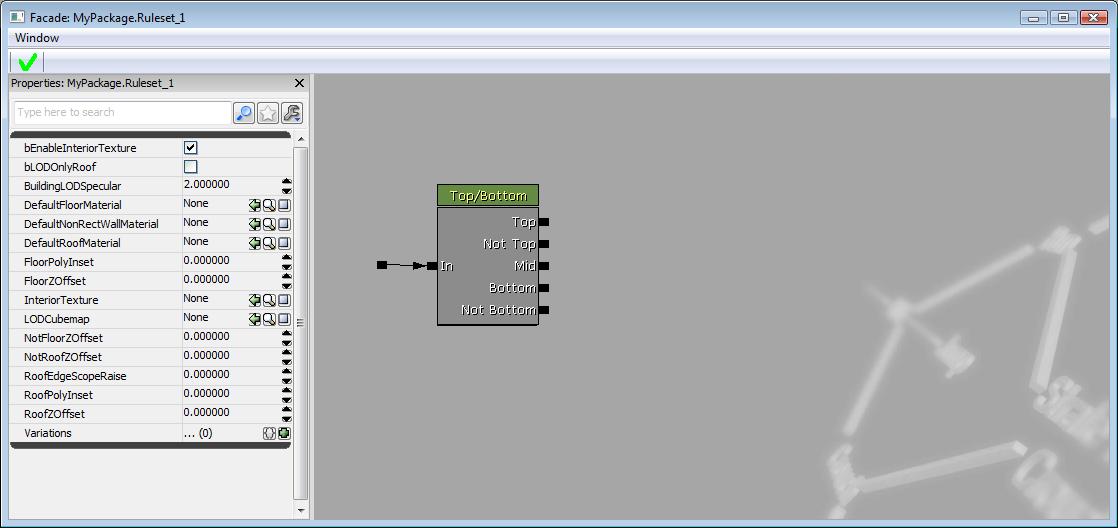
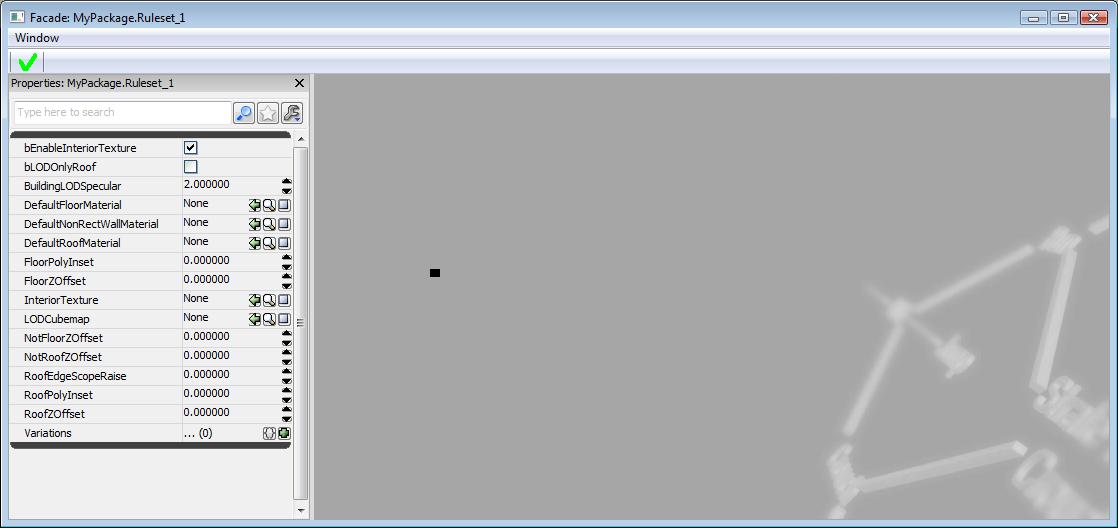 First off, we will need to create a Top/Bottom node. Right-click in Facade and select it from the list. This node allows us to define the top, bottom, and middle sections of the building.
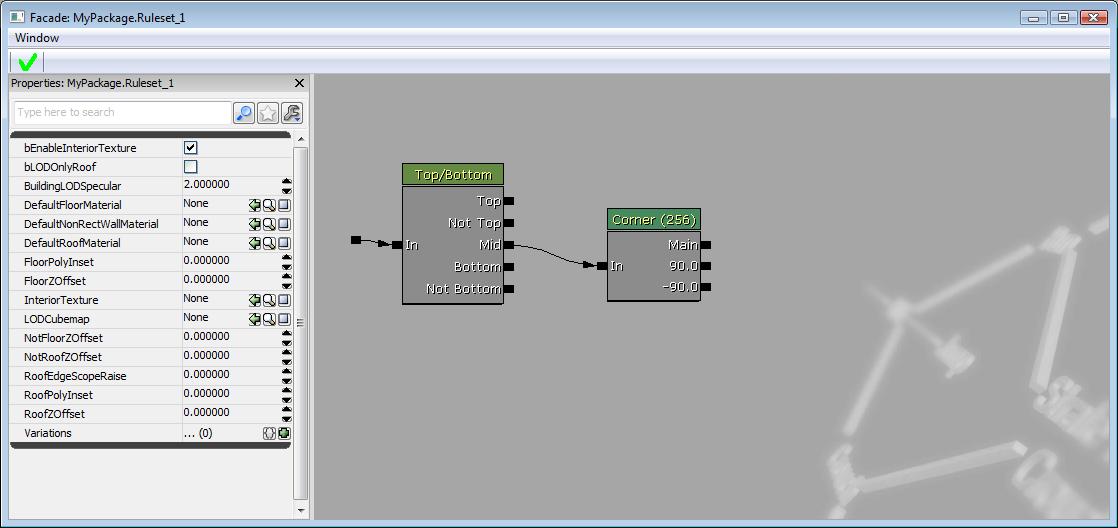
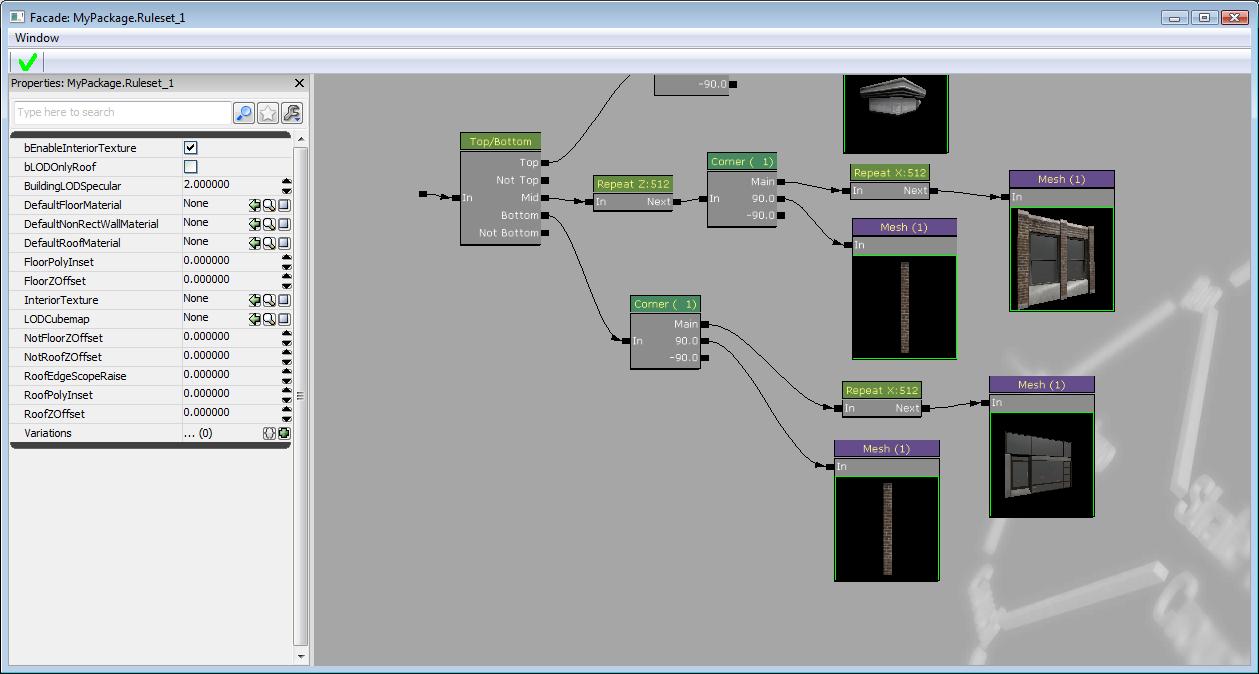
 Next we will need to add a Corner node. Right-click and select it from the list. Hook it up to the Mid attachment of the Top/Bottom node. This will allow us to define an outside corner mesh, inside corner mesh, and main meshes.
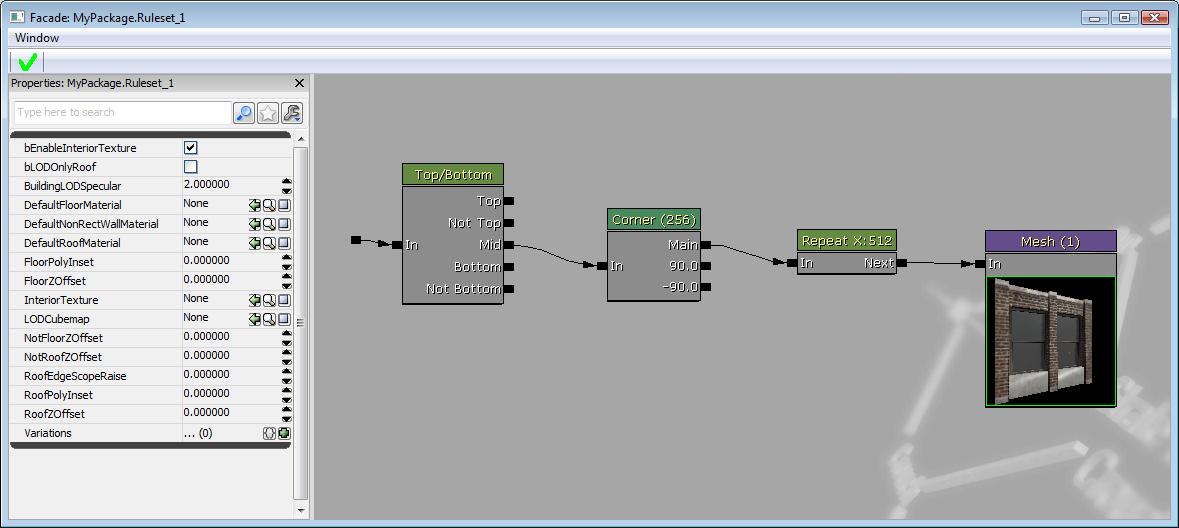
 We can now add our window or wall mesh. Create a Mesh node by selecting the Static Mesh you want in the Content Browser and select Mesh from the right-click menu in Facade. Alternately you can hold the 'M' key and left-click in Facade to create the node. In the Mesh node Properties, you will need to define the X Z dimensions (DimX and DimZ). For this example we are using a window mesh that is 512 x 512.
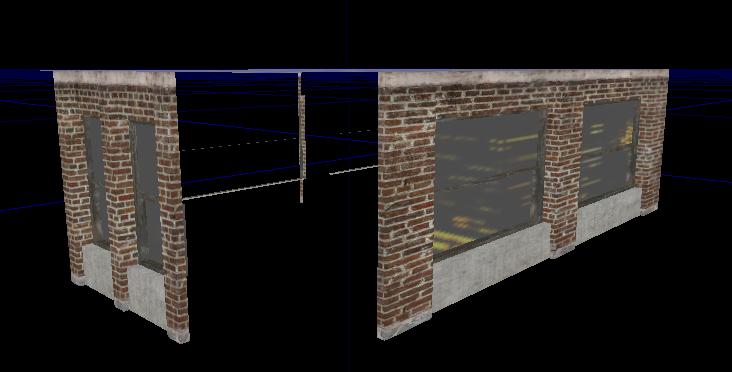
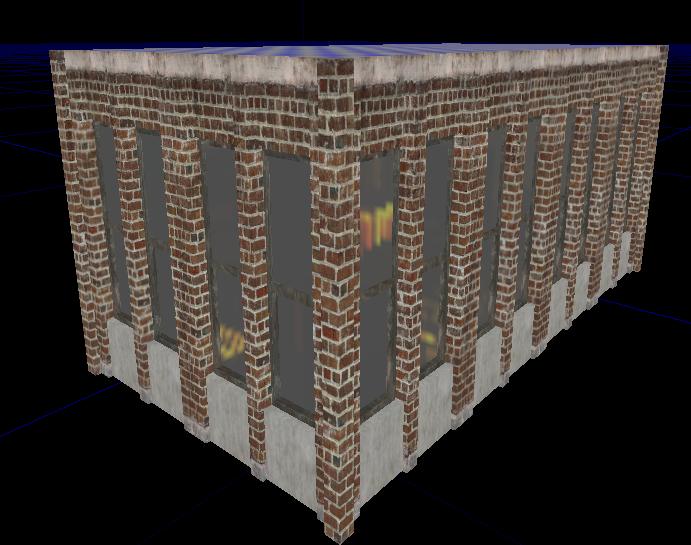
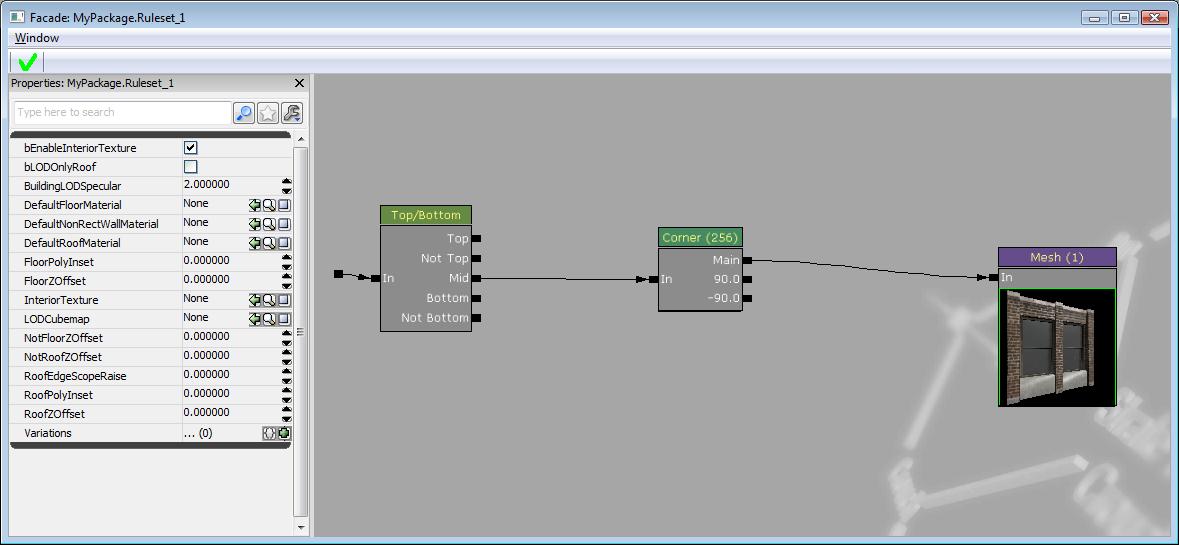 This is what our building looks like so far:
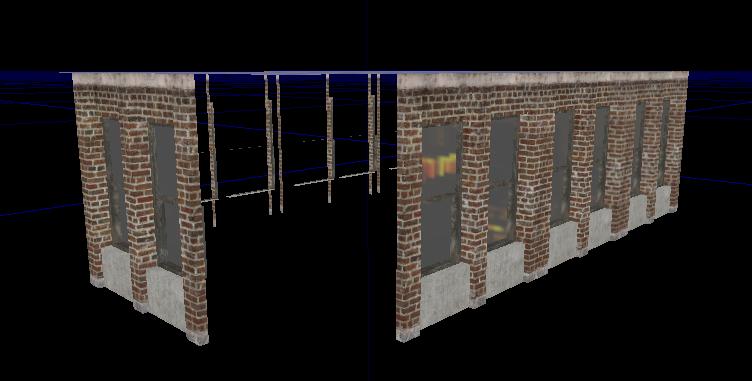
 You will notice that the mesh gets stretched along the longer side of our ProcBuilding Volume. To fix this, we need to have the mesh repeat along the x axis. Add a Reapeat node from the right-click menu and hook it up between the Corner node and the Mesh node. Change the repeat axis to EPBAxis_X in the node properties. Make sure to set the repeat size to the DimX of your mesh.
 The result:
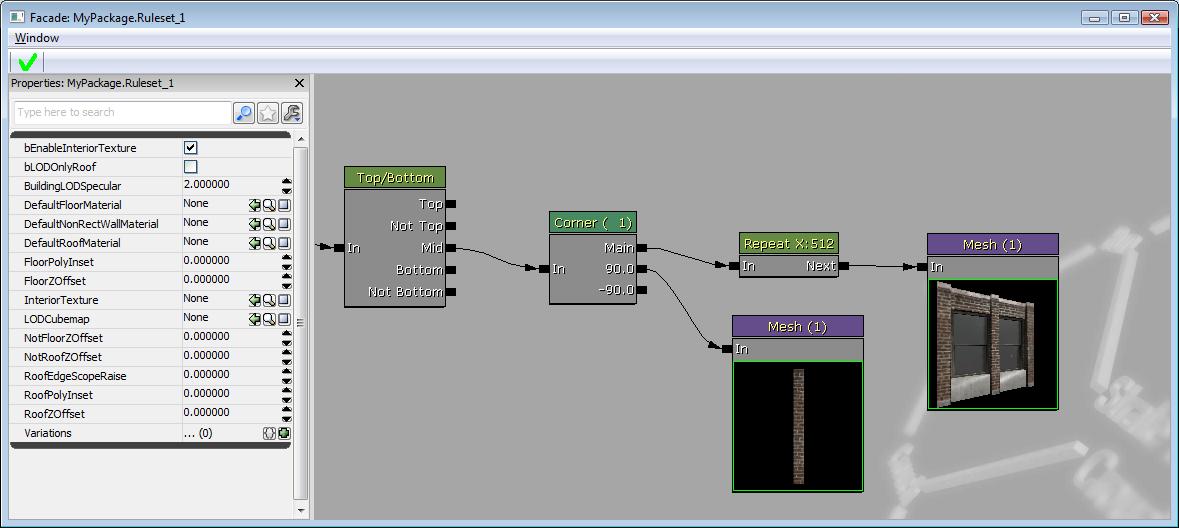
 Now we need to define the corner meshes. Currently there is an empty placeholder space at each corner of the ProcBuilding Volume.
Create a new Mesh node using your corner Static Mesh and hook it up to the 90 degree attachment slot. Make sure to set the dimensions of the mesh in the properties of the Mesh node and also the size of the corner. For this example we used '1' for the corner size and for the DimX on the Mesh node. You might need to play with these values in order to get your mesh to fit correctly. It mostly depends on where the pivot of the corner mesh is located.
Now we need to define the corner meshes. Currently there is an empty placeholder space at each corner of the ProcBuilding Volume.
Create a new Mesh node using your corner Static Mesh and hook it up to the 90 degree attachment slot. Make sure to set the dimensions of the mesh in the properties of the Mesh node and also the size of the corner. For this example we used '1' for the corner size and for the DimX on the Mesh node. You might need to play with these values in order to get your mesh to fit correctly. It mostly depends on where the pivot of the corner mesh is located.
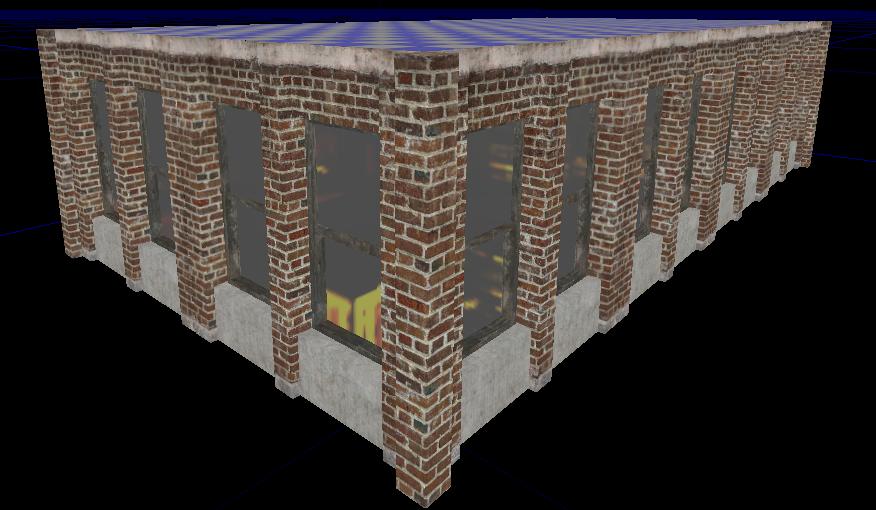
 The result:
 At this point we have one complete floor of the building. We can edit the width of the ProcBuilding Volume and the meshes will adjust correctly to fit the size of the volume. If you try and edit the height of the volume you will notice that the meshes begin to stretch.
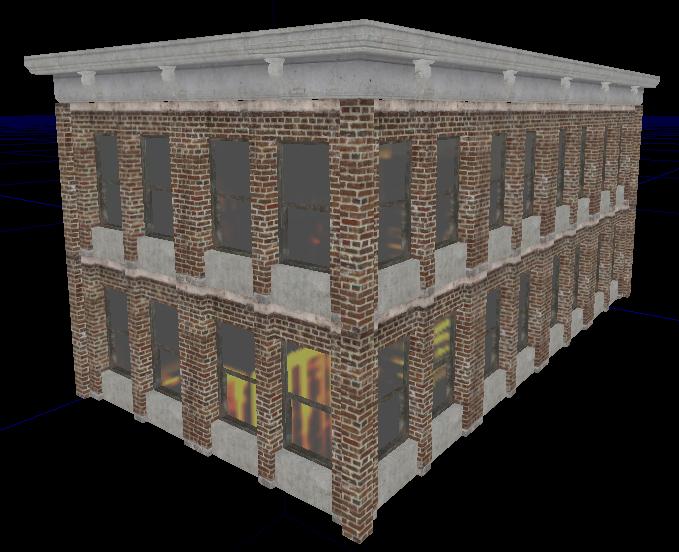
 To fix this, we need to repeat each floor along the Z axis. To do this, add a Repeat node before the Corner node and set repeat axis to EPBAxis_Z. Set the repeat size to 512.
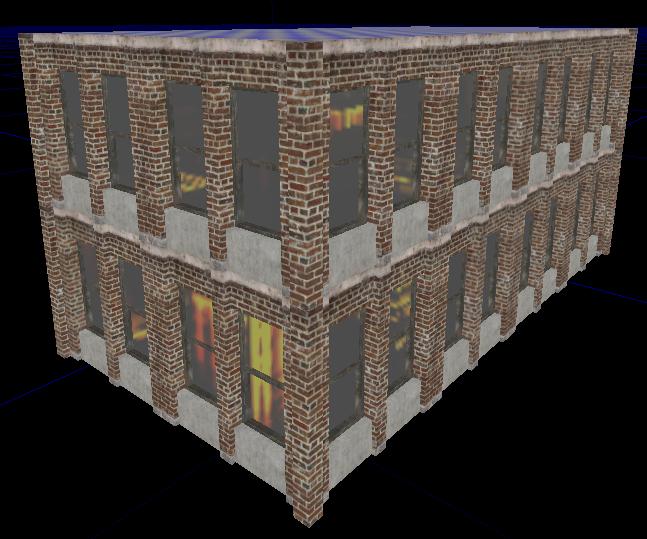
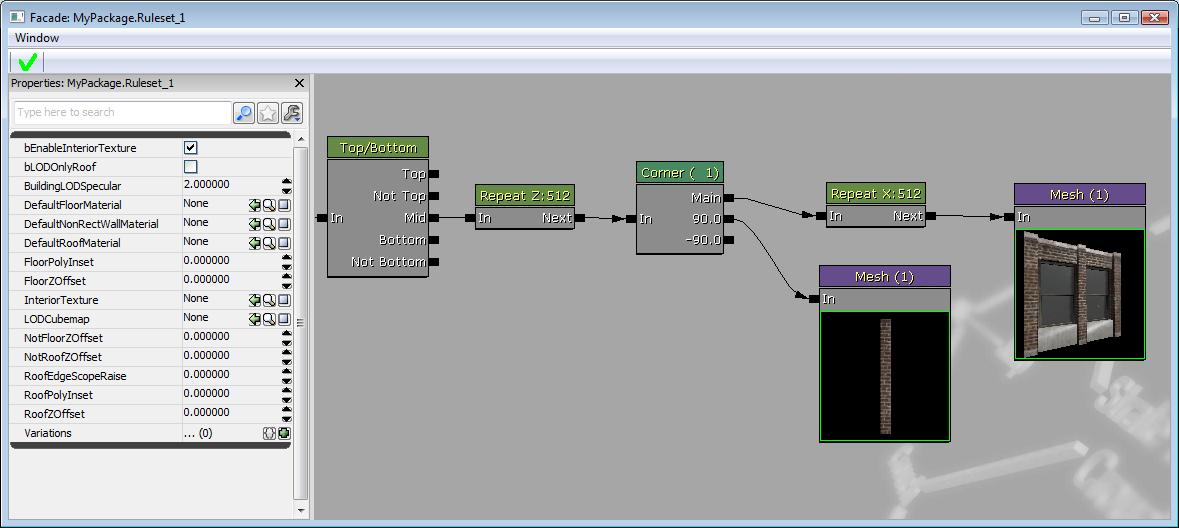 The result:
Setting Up The Top Trim
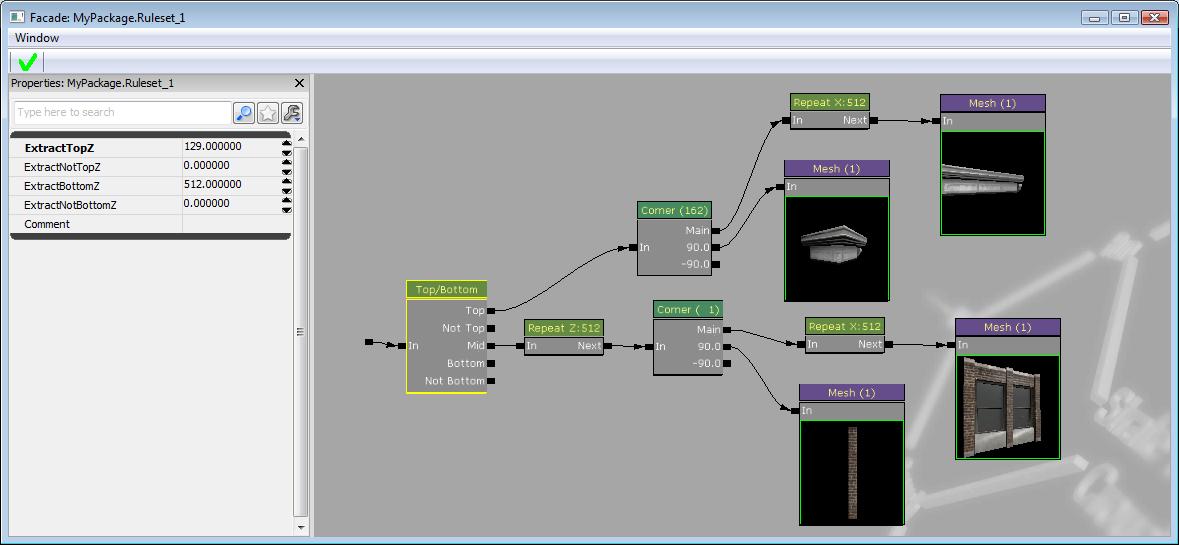 The result:
Setting Up The Ground Floor
 The result:
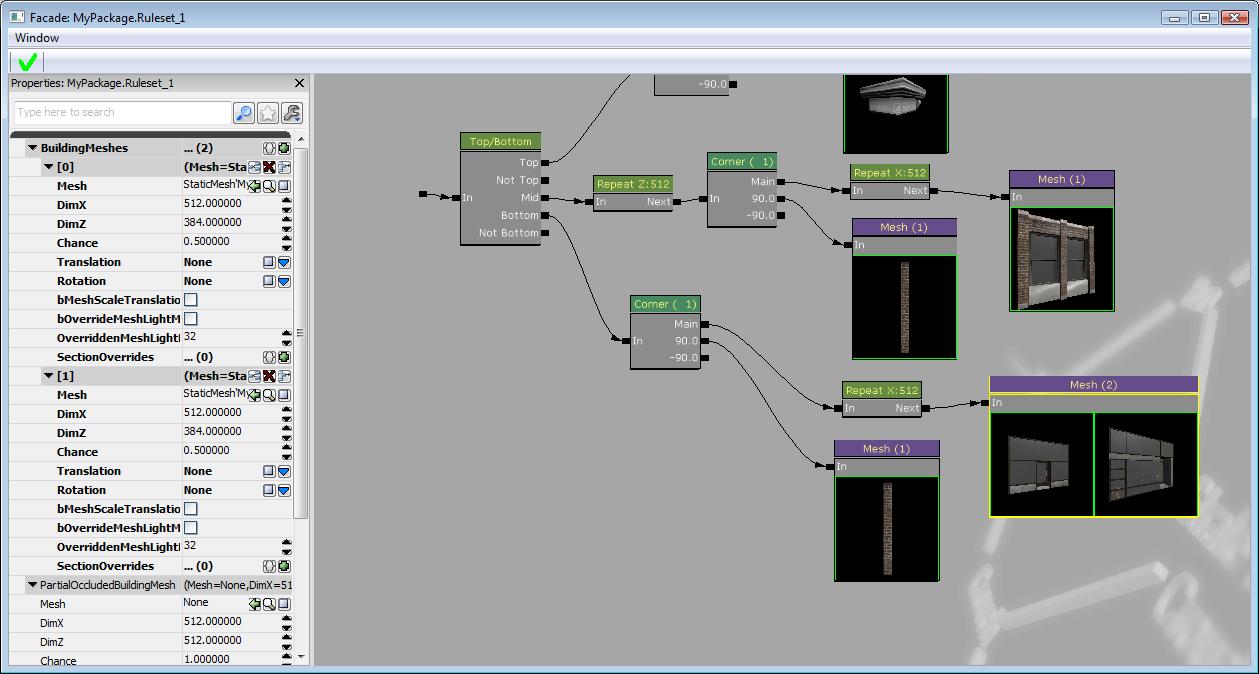
 The way this is currently setup, the ground floor consists of one repeating storefront Static Mesh. To add variety, add another mesh slot on the Mesh node for the storefront. Add a different Static Mesh in the new slot. Now set the chance that each mesh has of filling the slot. In this example we used .5 for each mesh.
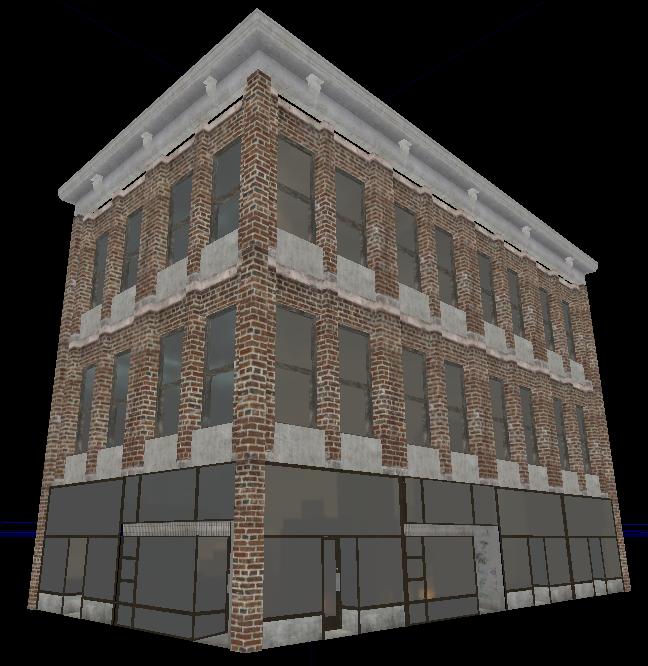
 The result:
 This should provide a good basis to get you started creating Procedural Buildings in UnrealEngine3. Refer to the Procedural Buildings page for further documentation.
