UDN
Search public documentation:
MobileMaterialReference
日本語訳
中国翻译
한국어
Interested in the Unreal Engine?
Visit the Unreal Technology site.
Looking for jobs and company info?
Check out the Epic games site.
Questions about support via UDN?
Contact the UDN Staff
中国翻译
한국어
Interested in the Unreal Engine?
Visit the Unreal Technology site.
Looking for jobs and company info?
Check out the Epic games site.
Questions about support via UDN?
Contact the UDN Staff
UE3 Home > Mobile Home > Materials for Mobile Platforms
UE3 Home > Materials & Textures > Materials for Mobile Platforms
UE3 Home > Character Artist / Environment Artist > Materials for Mobile Platforms
UE3 Home > Materials & Textures > Materials for Mobile Platforms
UE3 Home > Character Artist / Environment Artist > Materials for Mobile Platforms
Materials for Mobile Platforms
Overview
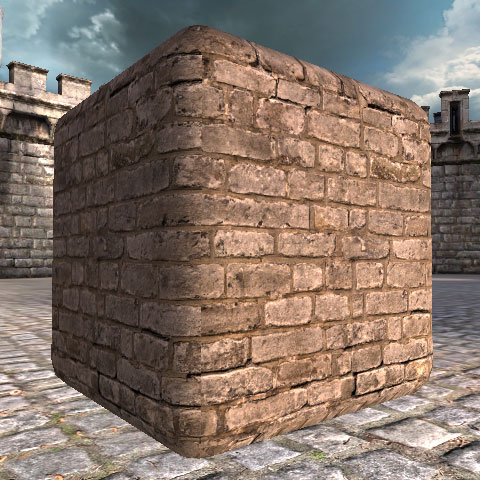
 Mobile material settings are stored alongside the regular shader network material data. This means you use the same material for rendering your mesh on both mobile platforms and other platforms (PC and consoles.) However on mobile platforms, the mobile-specific properties will control the material's visuals instead of the shader network's expressions.
This allows you to create a single material that will render optimally for both mobile platforms and PC or consoles.
Note that it is possible to automatically create mobile textures from your material's shader network by "flattening" the material into a texture.
Mobile material settings are stored alongside the regular shader network material data. This means you use the same material for rendering your mesh on both mobile platforms and other platforms (PC and consoles.) However on mobile platforms, the mobile-specific properties will control the material's visuals instead of the shader network's expressions.
This allows you to create a single material that will render optimally for both mobile platforms and PC or consoles.
Note that it is possible to automatically create mobile textures from your material's shader network by "flattening" the material into a texture.
Previewing Mobile Materials
 Note: Editor viewports may not display materials as they appear on mobile devices. The editor uses the material expression network that you set up in the material editor to render materials. You can emulate mobile materials in the editor by setting up your expression network based on your mobile material settings.
Mobile Material Properties
Basic
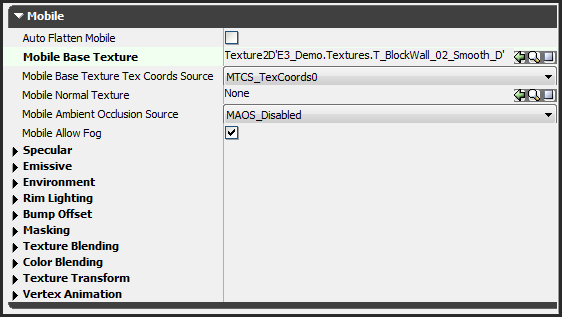
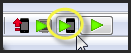
The most important texture properties is the Base Texture, but several other miscellaneous settings can be found in the main section of mobile material properties too.- Auto Flatten Mobile - When enabled, the editor will automatically generate a Base Texture using the material shader network expressions. See the section on flattening for more information.
- Mobile Base Texture - The base texture for this material. For most materials, you can think of this as your diffuse texture. If this texture is missing, a default texture will be displayed instead (unless automatic flattening is enabled.)
- Mobile Base Texture Tex Coords Source - This is where you select which vertex UV set you want to use when sampling the base texture. You can a single UV set to use from up to the four available UV sets. Except in special cases, you usually want to use the first UV set (TexCoords0) for this.
- Mobile Normal Texture - Sets a normal map texture for this material and enables per-pixel shading features. A normal map texture may be required for other material features, such as per-pixel specular. Setting a normal map texture may significantly impact the shading performance of the material.
- Mobile Ambient Occlusion Source - Enables baked ambient occlusion, which scales the amount of sky lighting (or ambient light) applied to the mesh. If your mesh has ambient occlusion data baked into the vertex colors, you can select the color channel the data is stored in here. Currently, this feature only works for dynamically lit skeletal meshes. Performance cost of this feature is very minimal.
- Mobile Allow Fog - Enables distance-based fog for this material. You can disable this to turn off fog on primitives that won't need it. Disabling this feature may improve shading performance.
Specular
These settings allow you to enable and configure specular lighting. Specular lighting allows for a more realistic lighting model.- Use Mobile Specular - Enables dynamic specular lighting on this material. For primitives with light environments, the most prominent light direction for the object will be used for specular lighting. Otherwise, the brightest directional light in the scene will be used for specular lighting (point lights are not supported, yet.) For mobile, specular lighting can be enabled even on primitives that are otherwise unlit. Enabling specular will have a significant performance cost.
- Use Mobile Pixel Specular - Enables high quality per-pixel specular highlights. When specular is enabled and a normal map texture is set, turning this setting on will enable per-pixel specular lighting. Otherwise, per-vertex specular lighting will be used. Per-pixel specular is significantly more costly to performance than per-vertex specular.
- Mobile Specular Color - Color to use for specular highlights. Note that the light source's color will be automatically taken into account, but you can use this to achieve a preferred highlight color if you want. Changing this setting has no performance impact.
- Mobile Specular Power - Sets the sharpness of the specular highlight. Higher values yield a sharper highlight, while smaller values produce a broad, dull highlight. If you're using per-pixel specular, usually you can get away with much sharper highlights than when using per-vertex specular. Changing this setting usually has no performance impact.
- Mobile Specular Mask - Sometimes it's useful to restrict specular to specific areas of a primitive. You can achieve this by painting specular mask data into either the mesh's vertex color, a mask texture or by simply using a channel in the diffuse texture as a mask. Also, you can select 'Luminance' to use the diffuse texture's luminance value as the specular mask. By default, specular is not masked (Constant) and will affect the entire primitive uniformly. Enabling a specular mask will have some performance impact.
Emissive
These settings are for emissive lighting effects. Emissive lighting lets your material appear to produce light from it's surface.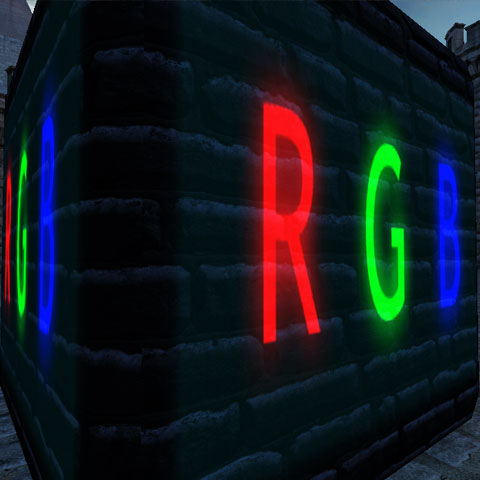
- Mobile Emissive Texture - Sets the emissive texture and enables emissive lighting (when Mobile Emissive Color Source is set to Emissive Texture.) Emissive color is not influenced by lighting and basically allows your material to 'glow in the dark'. There is only minor performance cost with enabling emissive lighting.
- Mobile Emissive Color Source - Selects the source of emissive light.
- Emissive Texture - Emissive lighting will only be enabled if a texture is bound to the 'Mobile Emissive Texture' property.
- Base Texture - Enables emissive lighting and uses the base texture as the emissive color.
- Constant - Enables emissive lighting and uses a constant color. When enabled, the color value is set in the 'Mobile Emissive Color' property. Constant emissive yields uniform emissive lighting over the entire primitive, but is the cheapest type of emissive lighting, performance-wise.
- Mobile Emissive Color - Sets the color to use for emissive lighting when 'Emissive Color Source' is set to 'Constant'. Changing this setting has no performance impact.
- Mobile Emissive Mask Source - Allows you to scale the contribution of emissive lighting over the surface of the primitive.
- Constant - Disables emissive masking. This is the cheapest mode, performance-wise.
- Vertex Color (Channel) - Scales emissive contribution by the specified vertex color channel.
- Base Texture (Channel) - Scales emissive contribution by the specified base texture color channel.
- Mask Texture (Channel) - Scales emissive contribution by the specified mask texture color channel.
- Normal Texture Alpha - Scales emissive by the normal map's alpha channel. You must supply a valid Normal Texture for this to work.
Environment
These settings let you turn on environment mapping and configure how it looks. Environment reflections are usually used to make objects appear more glossy, or even more metallic.- Mobile Environment Texture - Enables spherical environment reflection mapping and sets the environment map texture to use. If a normal map texture is bound, environment mapping will be computed per-pixel, otherwise per-vertex. Environment mapping adds significant performance cost to your material.
- Mobile Environment Mask Source - Allows you to scale the contribution of environment mapping over the surface of the primitive.
- Constant - Disables environment map masking. This is the cheapest mode, performance-wise.
- Vertex Color (Channel) - Scales environment map contribution by the specified vertex color channel.
- Base Texture (Channel) - Scales environment map contribution by the specified base texture color channel.
- Mask Texture (Channel) - Scales environment map contribution by the specified mask texture color channel.
- Normal Texture Alpha - Scales environment map by the normal map's alpha channel. You must supply a valid Normal Texture for this to work.
- Mobile Environment Map Amount - Sets the 'strength' of the environment reflection map, or how much the environment map will contribute to the primitives final color. Larger values yield a bright environment reflection. There is no performance cost to change this setting.
- Mobile Environment Blend Mode - Configures how the environment map combines with base diffuse lighting on the primitive. By default, environment reflection is added to the diffuse light, but you can also configure it to "replace" the diffuse texture color by interpolating based on reflection amount. There is no significant cost to changing this setting.
- Add - The environment reflection will be added to the diffuse light contribution, creating a bright, glossy reflection. This is the default.
- Lerp - The diffuse texture and environment texture will be blended together by the environment reflection amount. This yields a more metallic effect without increasing the primitives brightness.
- Mobile Environment Color - Scales the color of the environment map reflection. Changing this setting has no performance impact.
- Mobile Environment Fresnel Amount - Enables a fresnel effect when set to a value other than zero, which can be used to reduce the reflectivity of the surface at direct angles to the viewer. The value controls what percentage of the environment map's contribution is affected by fresnel. Usually fresnel yields a more realistic reflection, but enabling this feature will add some performance overhead to your material.
- Mobile Environment Fresnel Exponent - Sets the sharpness of the fresnel effect when fresnel is enabled. Higher values will require a more glancing view angle for reflections to be visible, where lower values will yield a broad reflective surface. Changing this setting usually has minimal performance impact.
Rim Lighting
These properties allow you to enable a rim lighting effect for your material. Rim lighting is used to highlight the silhouette of your object.- Mobile Rim Lighting Strength - Enables rim lighting when set to anything except zero, and sets the strength of the rim lighting effect. This feature has a significant performance cost.
- Mobile Rim Lighting Exponent - Sets the sharpness of the rim lighting effect around the object's silhouette. Larger exponent values will yield a tighter highlight at glancing angles to the viewer, while smaller values will create a broad effect over the surface. There is usually no significant performance cost to changing this setting.
- Mobile Rim Lighting Mask Source - Allows you to scale the contribution of rim lighting over the surface of the primitive.
- Constant - Disables rim light masking. This is the cheapest mode, performance-wise.
- Vertex Color (Channel) - Scales rim lighting contribution by the specified vertex color channel.
- Base Texture (Channel) - Scales rim lighting contribution by the specified base texture color channel.
- Mask Texture (Channel) - Scales rim lighting contribution by the specified mask texture color channel.
- Normal Texture Alpha - Scales rim lighting by the normal map's alpha channel. You must supply a valid Normal Texture for this to work.
- Mobile Rim Lighting Color - Sets the color of the rim lighting effect. There is no performance cost to changing this setting.
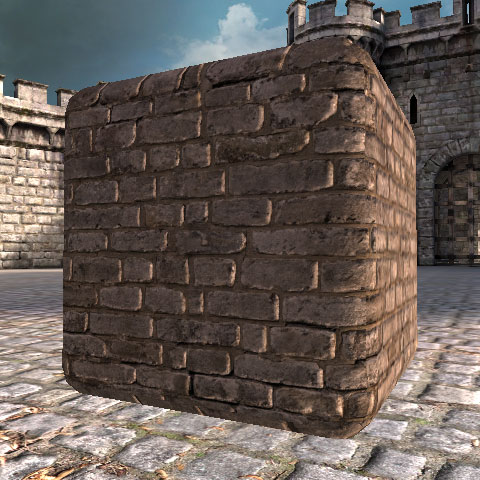
Bump Offset
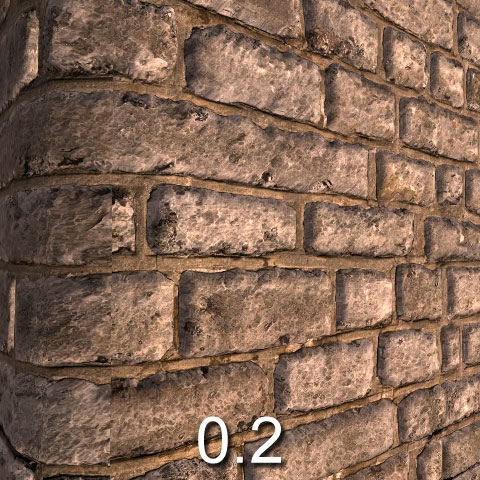
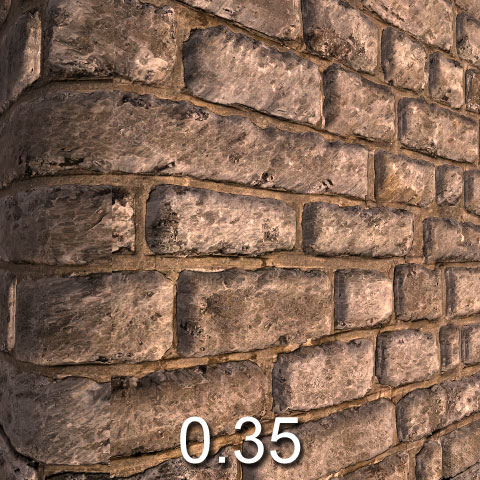
These properties allow you to enable a 'bump offset' effect that simulates a very primitive form of parallax displacement texture sampling. Basically this gives the appearance of 3D depth to your material based on the viewer's location. Note that bump offset needs to be applied in the World Properties. See this section for more info.- Use Mobile Bump Offset - Enables the bump offset effect. Important: When enabled, a Mask Texture must be set. The Mask Texture's red channel will be used to sample the bump offset height at every texel. You must remember to bind a Mask Texture if you want to use bump offset effects on mobile platforms. Enabling this feature has a fairly high performance cost.
- Mobile Bump Offset Reference Plane - Specifies the approximate height in texture space to apply the effect. A value of 0 will appear to distort the texture completely off the surface, whereas a value of 0.5 (the default) means that some of the surface will pop off while some areas will be sunken.
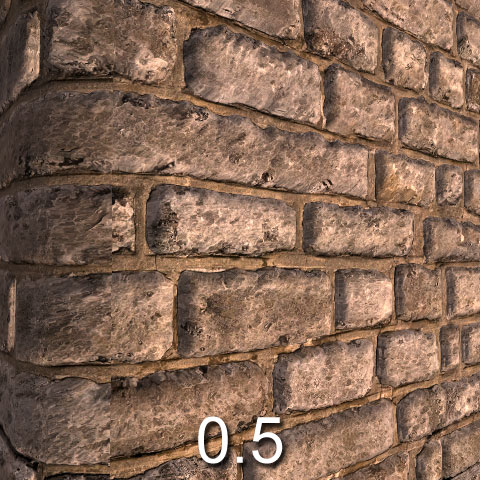
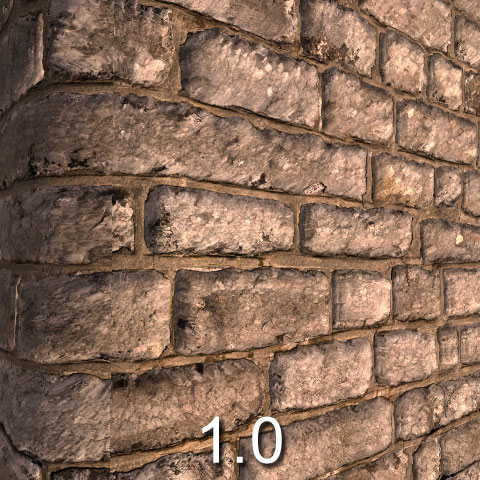
- Mobile Bump Offset Height Ratio - Multiplies the depth. The bigger the value, the more extreme the depth will be. Typical values range from .02 to .1.
Masking
The mask texture is a 'general purpose' texture that is used by various other mobile material features, such as bump offset or emissive/environment scaling. You'll only need to set it up when another feature you're using requires it. Mobile Mask Texture - Sets the texture to as the mask texture. Mask textures have various uses depending on the other features enabled in this material. Examples of information that can be stored in the mask texture are: Bump Offset amount, Detail Texture blend factor, Emissive/Environment/Rim Light Masking. Mobile Mask Texture Tex Coords Source - Selects the vertex texture coordinate set to use when sampling the mask texture. You can a single UV set to use from up to the four available UV sets.Texture Blending
These settings let you apply an additional texture to your material by blending it with your base texture. It's also possible to animate this second texture by using the Texture Transform properties.- Mobile Detail Texture - Sets the 'detail texture' to use for this material. Detail textures are usually used for blending between textures, or to blend an animated texture with the base texture. When a detail texture is set, it will be blended with the base texture using the value configured in the 'Mobile Texture Blend Factor Source' property. Setting a detail texture will cost some performance as it introduces an extra texture to sample.

- Mobile Detail Texture Tex Coords Source - Selects the vertex texture coordinate set to use for the detail texture. Note that by default, the second UV set from the mesh is used for the detail texture. You can select from any of the four possible UV sets to use. Changing this setting usually has no significant performance impact.
- Mobile Texture Blend Factor Source - Selects where the 'alpha' value that's used to blend between the base texture and the detail texture comes from. You can either use the vertex color stored in the mesh, or a separate texture mask set using the 'Mobile Detail Texture' property. Usually, using a separate detail texture as the mask is more expensive that using a vertex color.
- Lock Color Blending - This is an advanced feature that allows this material to use texture blending even when forcibly disabled by the platform's system settings. You can think of this as allowing you to override system settings in order to create special case materials. In general, you should never turn this on.
Color Blending
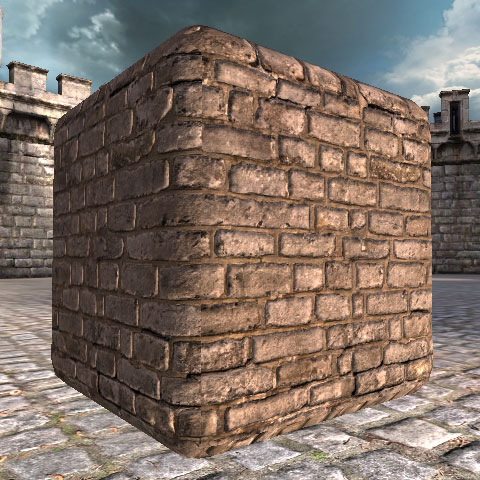
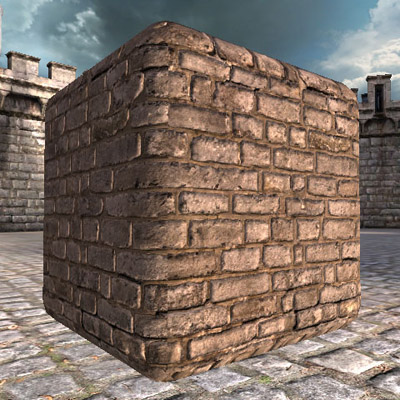
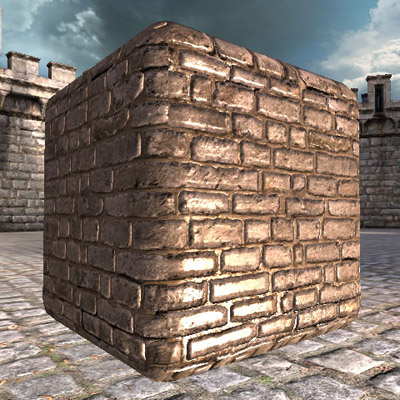
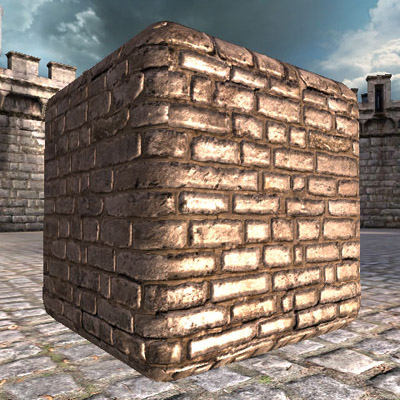
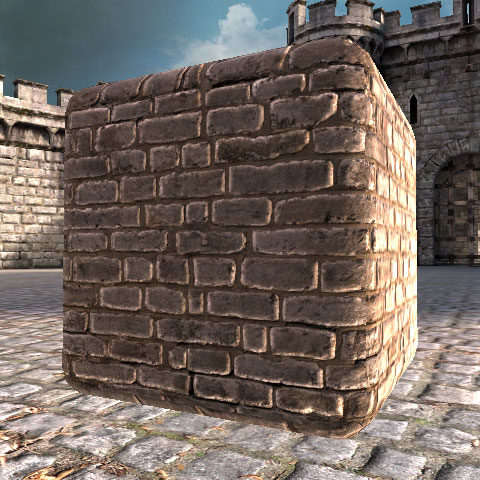
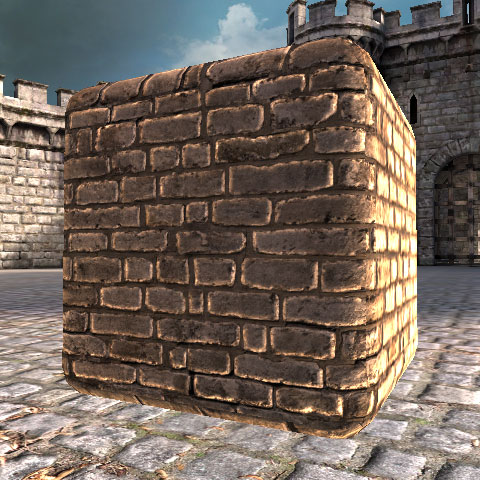
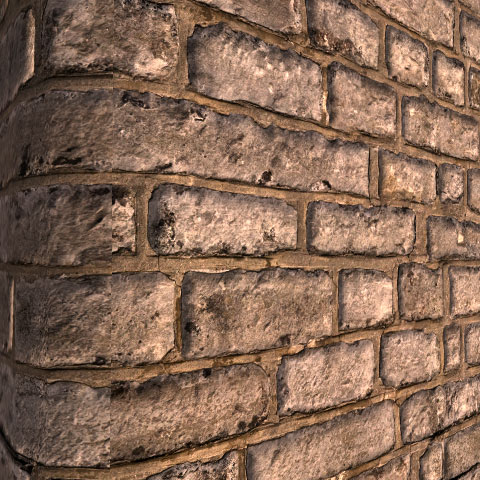
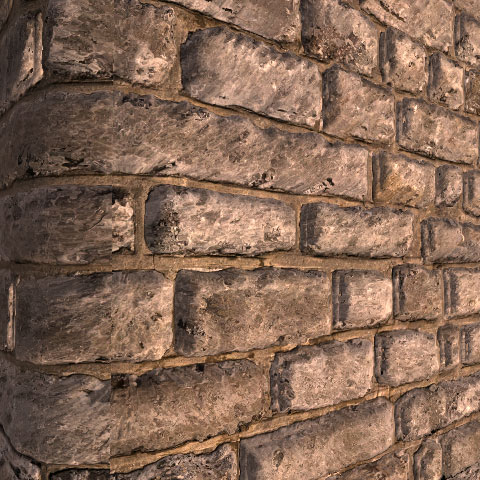
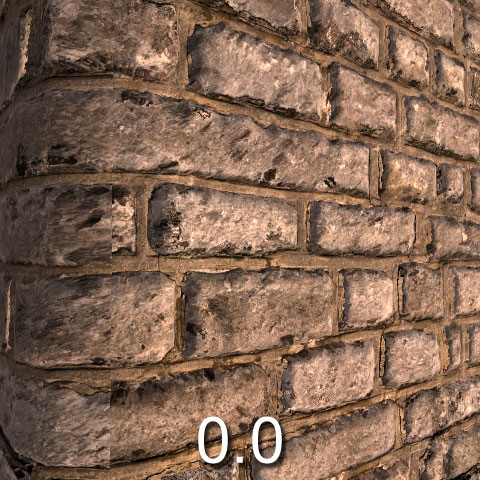
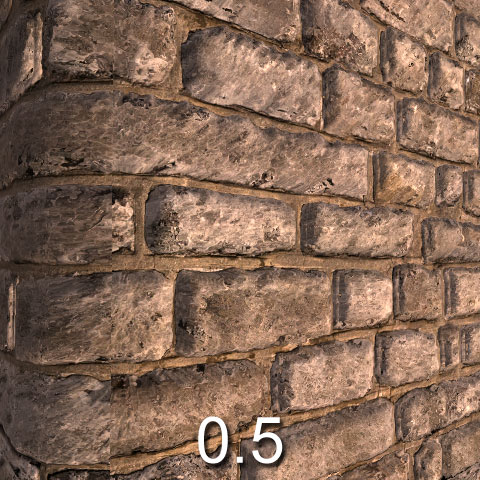
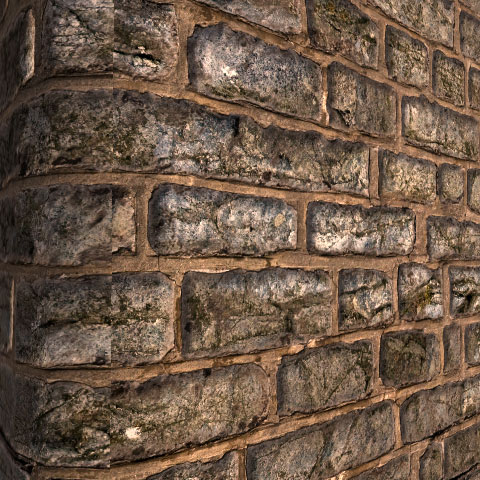
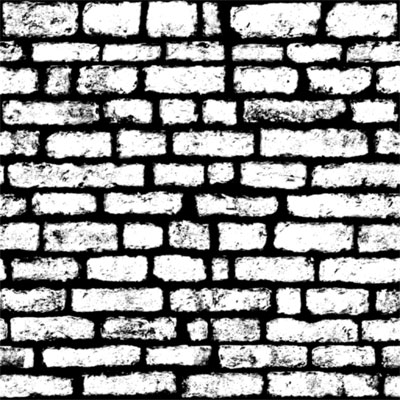
These settings let you apply painted vertex colors to your mobile material, or apply a single uniform color scaling to the entire material. Use Mobile Uniform Color Multiply - When enabled, scales the material's color by the color value specified in 'Default Uniform Color'. Enabling this has a very minor performance cost. Default Uniform Color - Sets the color to scale the material by when 'Use Mobile Uniform Color Multiply' is enabled. There is no performance cost to changing this setting. Use Mobile Vertex Color Multiply - Turns on vertex color scaling. This is useful when you've painted vertex colors into the mesh and want to use those when rendering, or when using particle systems that have vertex color animation. There is only a small performance cost to enabling this feature. If you attempt to use this option with a mesh which does not have vertex color data, then the material will fallback to a glaring pink to allow easy identification of the issue.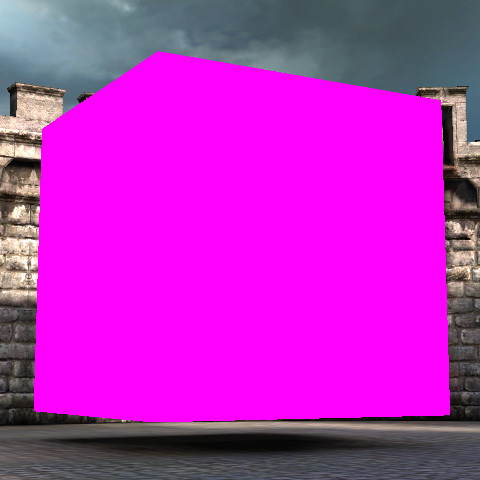 Mobile Color Multiply Source - This option is available to allow a user to manipulate where they would like to apply the color blend. Given a simple material using the left texture as the Base Texture and the right as a Mask Texture
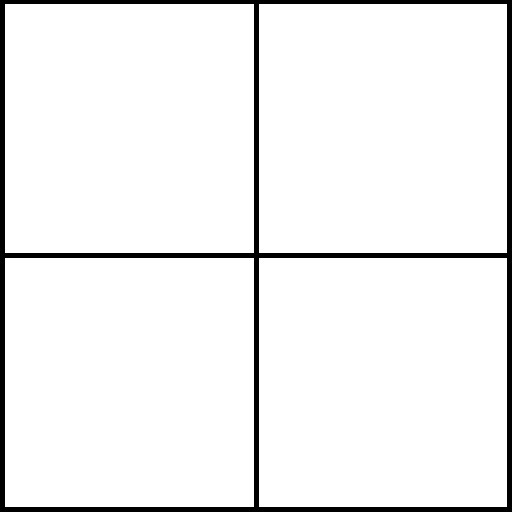
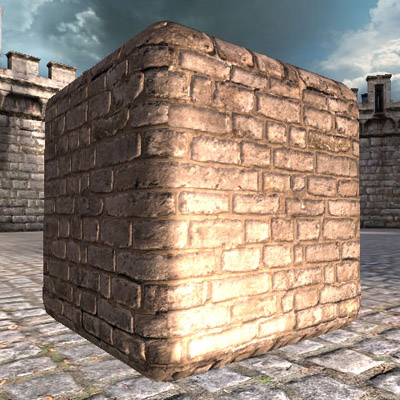
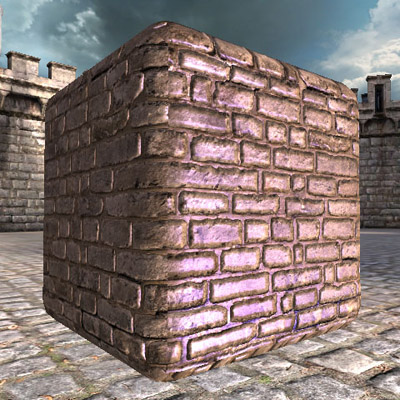
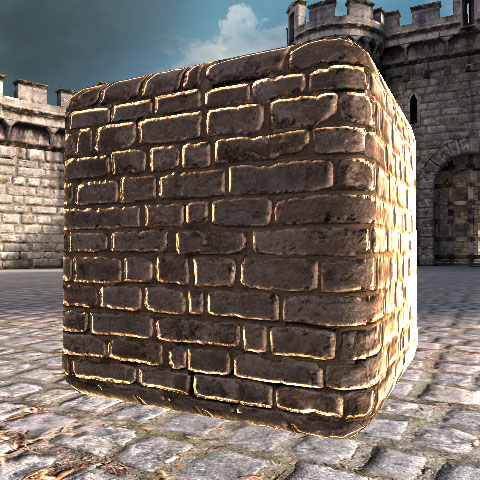
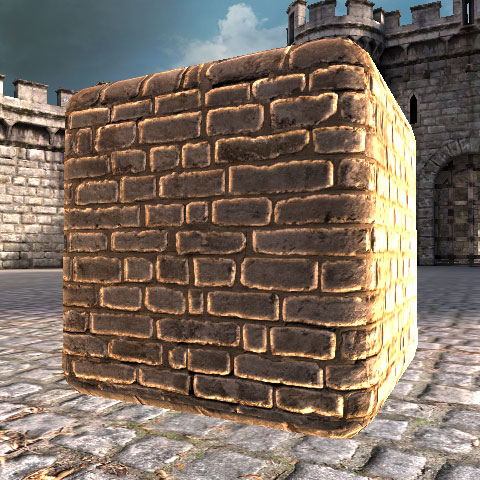
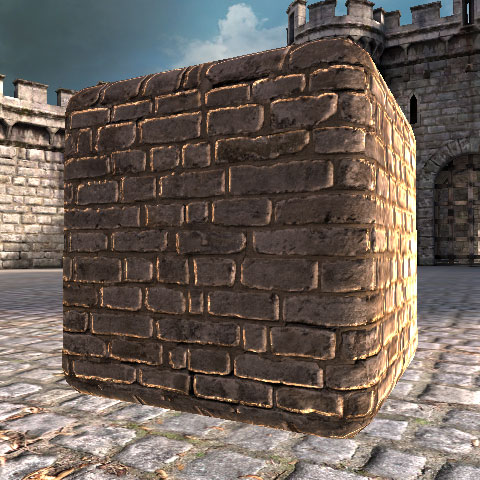
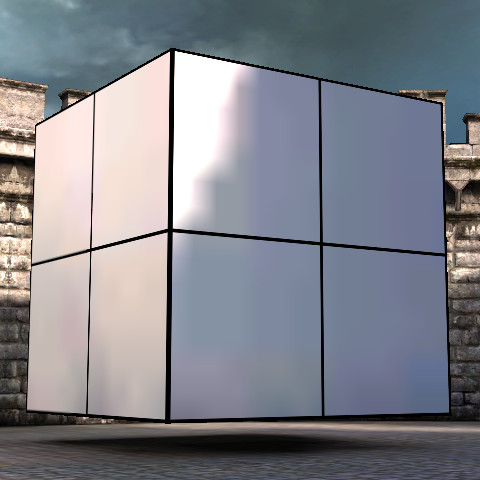
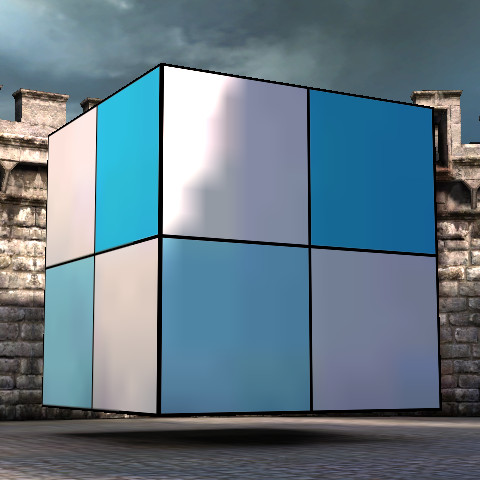
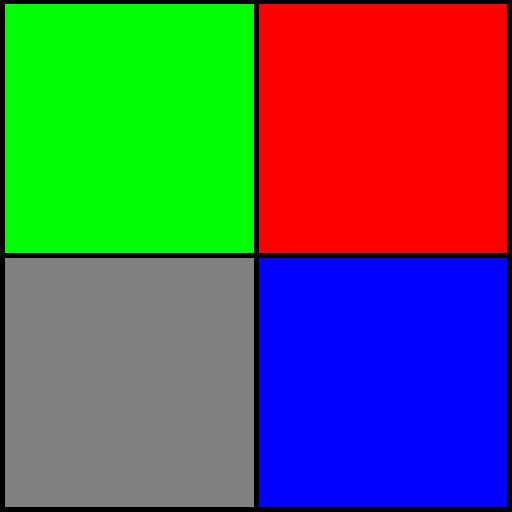 If you enable a color multiply option and Choose a channel from this drop down, you can manipulate certain areas of the material. The left image shows no blending, the next is using a default uniform color with the Mask Textures Red Channel, whilst the final is using a default uniform color with the Mask Textures Blue Channel
Texture Transform
These settings allow you to animate your materials! You can dynamically translate, rotate and scale texture UVs for either the base texture or detail texture. You can also apply a fixed scale to the texture UVs, or even apply simple sine-based oscillation.- Use Mobile Texture Transform - If true, transform effects will be enabled for this material. There is a medium performance cost when this feature is turned on.
- Mobile Texture Transform Target - Selects which texture's UV set should be transformed, either the base texture or the detail texture.
- Transform Center X - Specifies the center of transformation in X for any rotation or scaling transformations.
- Transform Center Y - Specifies the center of transformation in Y for any rotation or scaling transformations.
- Panner Speed X - Specifies the speed at which the texture should pan in X.
- Panner Speed Y - Specifies the speed at which the texture should pan in Y.
- Rotate Speed - Specifies the speed at which the texture should rotate. Positive values are clockwise. Negative values are counter-clockwise.
- Fixed Scale X - Specifies the amount the texture should be scaled in X.
- Fixed Scale Y - Specifies the amount the texture should be scaled in Y.
- Sine Scale X - Specifies the amount the sine wave should be scaled in X for an oscillation effect.
- Sine Scale Y - Specifies the amount the sine wave should be scaled in Y for an oscillation effect.
- Sine Scale Frequency Multiplier - A multiplier for the frequency used with any oscillation effects.
Vertex Animation
These properties can be used to configure special vertex animation effects. Typically these are used to procedurally animate foliage, flags or cloth using a simple parametric animation effect. Compared to skeletal animation, this type of animation is very cheap as it's performed by the graphics hardware.- Use Mobile Wave Vertex Movement - Turns on GPU-based vertex animation for this material. This adds significant performance overhead when enabled.
- Mobile Tangent Vertex Frequency Multiplier - This movement is perpendicular to the vector from the center line of the object to the vertex. It offers a bit of side-to-side sinusoidal movement to simulate wind (for trees, flags, etc). A value of 1 indicates the movement will cycle after 1 second.
- Mobile Vertical Frequency Multiplier - Similar to the tangent movement, this setting offers up-and-down sinusoidal movement along the world z-axis. A value of 1 indicates the movement will cycle after 1 second. Normally, this value is kept offset from the tangent vertex frequency multiplier to avoid the appearance of looping.
- Mobile Max Vertex Movement Amplitude - The distance from the unaltered world position at the peak of either the tangential of vertical sine waves. This value is multiplied by the red channel of the vertex color painted on the mesh. If no vertex color is painted, no movement will be applied.
- Mobile Sway Frequency Multiplier - Using the objects y-axis (transformed into world space) and the object location, the sway movement offers a full object rotation to, for example, simulate the sway of a tree's canopy. This multiplier is used to speed up or slow down a standard 1 second cycle.
- Mobile Sway Max Angle - The maximum angle at the peak of sine wave for sway. This value is multiplied by the green channel of the vertex color painted on the mesh. If no vertex color is painted, no movement will be applied.
Flattening
Configuring Flattening
Texture flattening has a few .ini configuration values that must be set correctly for your game. These are:[MobileSupport] bShouldFlattenMaterials=TrueThis enables saving of flattened textures to new assets. Without enabling this feature, flattened textures will not be generated even when 'Auto Flatten Mobile' is turned on in the material's properties.
[MobileSupport]
FlattenedTextureResolutionBias=1
This sets the resolution bias for flattened textures. The higher this number, the lower resolution the generated textures will be. For example, a graph network material that has 512x512 as the largest texture will flatten to a 256x256 texture when FlattenedTextureResolutionBias is set to 1.
Lightmass and Mobile Materials
Modifying lightmaps
You can bake normal mapped lighting into Lightmass-generated lightmaps by enabling the 'Use Normal Maps for Simple Lightmaps' option in your level's WorldInfo properties. Just make sure you've configured a normal map in the shader network portion of your material so that Lightmass can find it. Additionally, you can modify a lightmap with a texture (to add per-instance dirtiness, etc) by using theSimpleLightmapModificationTexture and SimpleLightmapModificationFunction properties in the MobileSettings settings group on a StaticMeshComponent.
Mobile Shader Generation
Other Notes
- Shaders are compiled on the device during startup, which can greatly affect your game's boot time. Using different material setting combinations will cause unique shaders to be compiled. Note that two identical materials with only different textures will not cause two shaders to be compiled, only one.
- Certain material properties like
BlendModeandLightingModelare still respected, even in the mobile renderer, with some restrictions. You can create translucent or additive materials just like you normally would. Similarly, the varioususageflags are still used to delineate between decal materials, particle materials, etc. You should make sure these settings are configured correctly, like with regular Unreal materials.
- Remember that dynamic lighting features are very limited on mobile right now. Directional lights are fairly well-supported and some sky lighting/light environment features will work on characters. Static lights baked into light maps work great. However, may other combinations of light and shadow settings are not yet supported. For example, multiple direct lights affecting a single primitive is only supported in special cases (light environment influence).
- Currently, sky lights are always enabled for dynamically-lit skeletal meshes. These use light environments to compute an
UpandDowncolor, then render using the settings configured in your material.
- Fog is supported on mobile but it works differently than on other platforms. Instead of fog volumes, level-specific distance-based fog settings are configured in the level's World Properties. See Per-level Rendering Settings for more information. Individual materials can opt out of being fogged using the
Allow Mobile Fogoption.
- Gamma Correction is supported on mobile devices, but can cause performance issues on all but the most powerful devices. See the Gamma section for information on creating content for use with non-gamma corrected devices.
- Mobile devices use the SimpleLightmaps (no directional lighting information is baked in). Simple lightmaps have a fixed color scale of 2.0, which means that lightmaps cannot brighten the diffuse texture by more than 2 times.
- Materials created using mobile switches will not display the effects set with those switches in the editor. This is because the editor uses Direct3D and mobile devices use OpenGL ES2 and require different shaders to display the effects. Use the mobile previewer to view your materials as they will appear on device.
